BURROUGHS CLASS 9 - INSIDE VIEWS,
REMARKS TO RESTORATION & MAINTENANCE
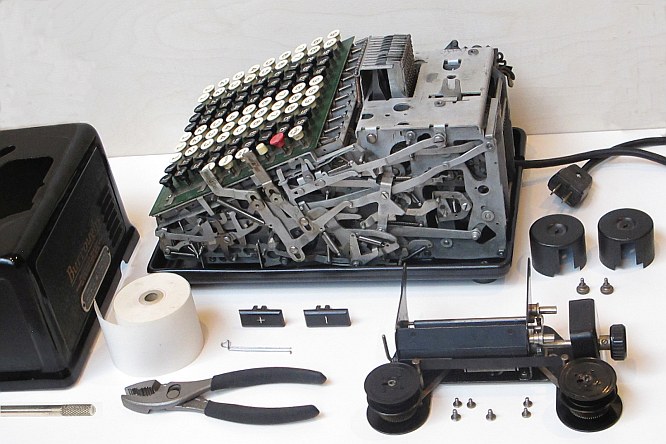
H O W R E M O V E C O V E R F O R M A I N T E N A N C E ...
********************************************************************
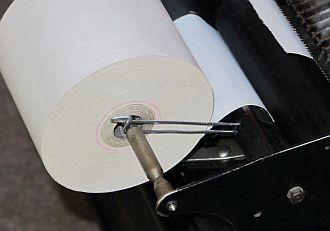
(_1) Remove the paper roll by unscrew its axle
(_2) Remove the 2 screws on front
(_3) Remove the 1st (visible/left) SCREW of the PRINTING UNIT
(_4) Remove the 2 screws on the (right) cover of the PRINTING UNIT
(_5) Shift the cover to the right
(_6) Now the 2nd SCREW of the PRINTING UNIT can be removed
(_7) Lift the PRINTING UNIT !!! OBSERVE the GEAR CONNECTION
(_8) Pull the [+] & [-] keys
(_9) Lift the cover of the machine
!!!
(10) Re-Install the PPRINTING UNIT temporary ...
... Otherways FONT-BARS MAY STUCK on the plate, when operated !!!
R E M A R K S T O R E S T O R A T I O N & M A I N T E N A N C E
========================================================================
(A)
The motor axle has an 8-32 thread - Can be used for MANUAL OPERATION with a
"TEST-CRANK" ...
(B)
... A home-made CLIP was made to hold the paper roll in place
|
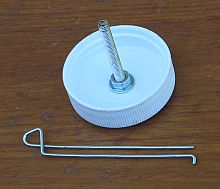
 ... See the
  When you got the SCREWS, take a DREMEL and WIDEN & DEEPEN the SLOTS !!!