R E M A R K S :
====================================================================================
[1st] "How to operate the ORIGINAL-ODHNER-239 ?" See ODHNER MAIN-SITE ...
[2nd] "How to START & FINISH Restoration / Maintenance ?"
===>>> Purpose of THIS WORKSHOP ...
====================================================================================
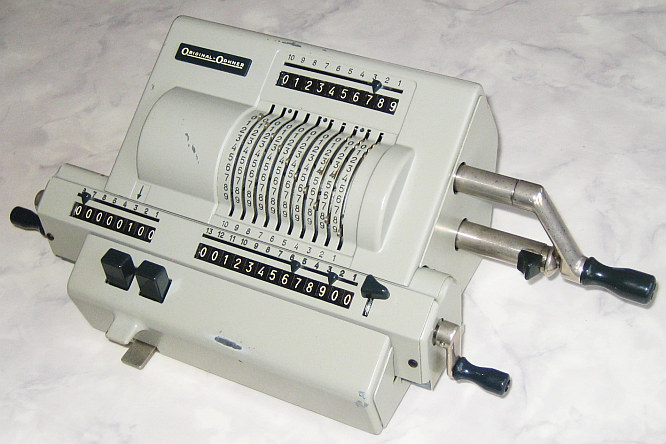
From Berlin FleaMarket " M O S T F U N C T I O N S L O C K E D " = OhOh !!!
************************************************************************************
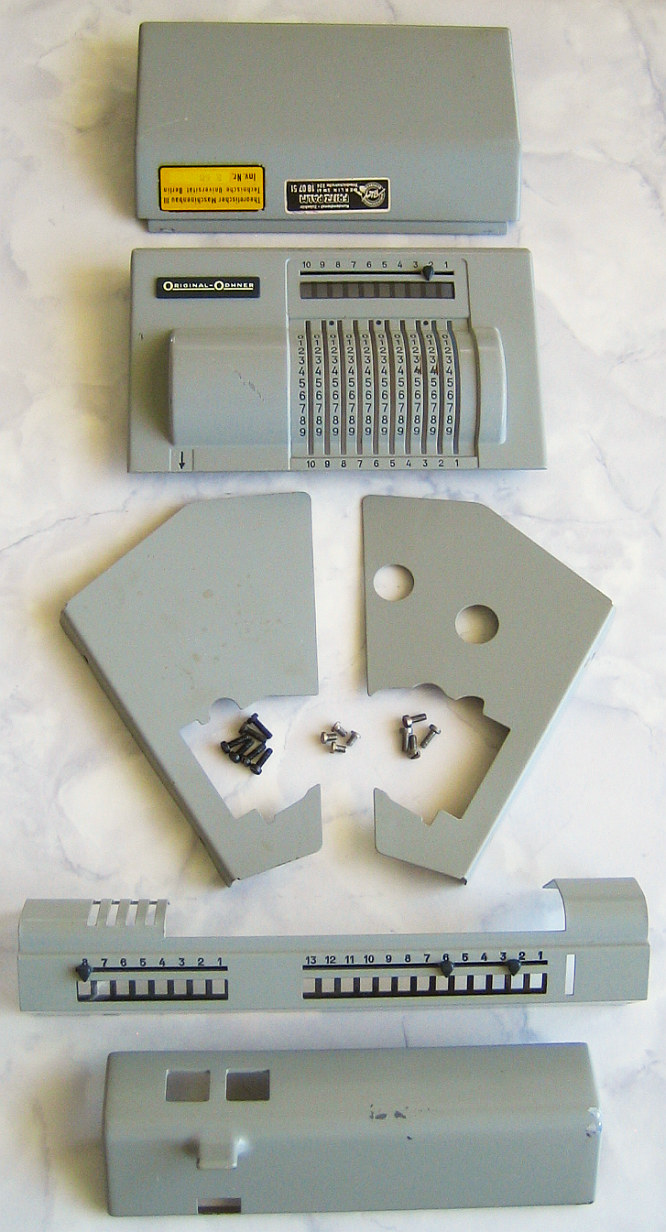
YELLOW INVENTORY TAG = "Theoretischer Maschinenbau / Technische Universitaet Berlin"
May be I have used THIS MACHINE in the TUB-LAB as an Engineer-Student in the 1960s ?
OPEN THE ODHNER-239 ...
-----------------------
o CLEAR all registers ( if possible - IF NOT, TRY TO CONTINUE ! )
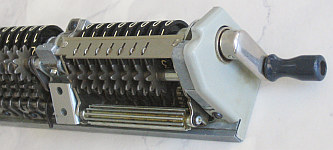
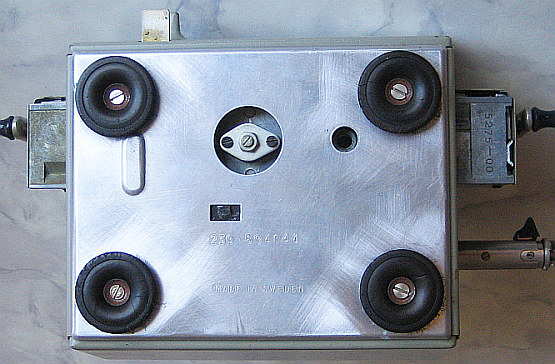
o Flip the calculator upside down. See Pictures (1) & (10): Remove the 2 screws of
the CARRIAGE-LIMITER and pull it out. Flip the calculator upside again. See
arrow in (10): Press the FRONT-LEVER with the left hand and pull-out the CARRIAGE
to the right with the right hand.
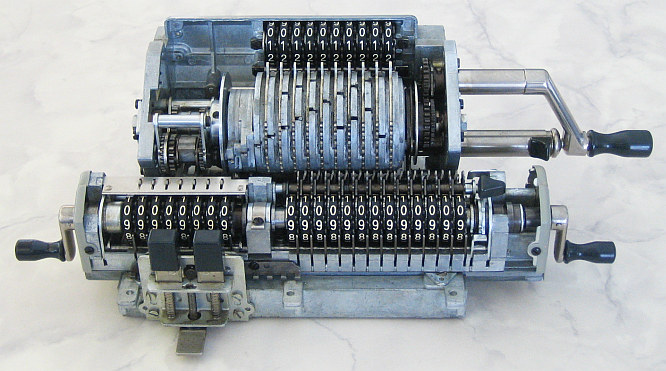
o Flip the calculator upside down again. Loose the 4 screws in the center of the
4 feet. Lift the BOTTOM-PLATE with feet and screws. Now there is access to the
2x2 screws of the side-plates, 3 screws of the front-unit and 3 screws of the
back-unit ... Remove the screws.
o Start to remove the LEFT-SIDE-PLATE: Be aware of its 2 clips!
o Move the RIGHT-SIDE-PLATE ( has 2 clips too!) to the right.
See (2): Unscrew and remove the CRANK-LOCK. Remove the right-side-plate ...
o Remove the FRONT-UNIT ( pressing both black keys !)
o Flip the calculator upside again.
o Remove the 2x2 screws of the TOP-UNIT.
o Remove the TOP- and BACK-UNIT.
o Remove the CARRIAGE-COVER - but N O T the CARRIAGE-SIDE-PLATES.
o Replace the 4 CARRIAGE SCREWS.
IN WORST CASE ... 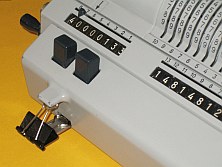 [*]
-----------------
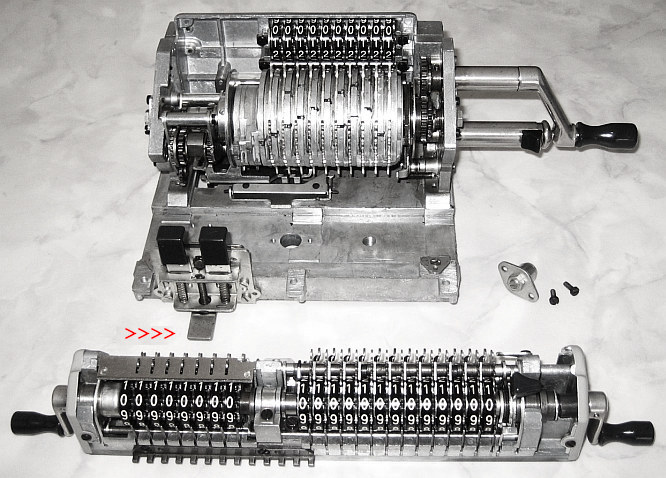
... the carriage is not removable, because the input-unit could not be cleared.
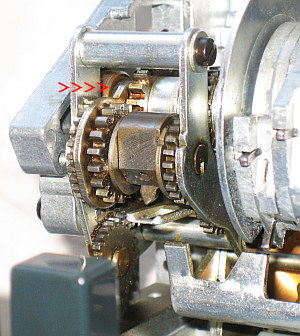
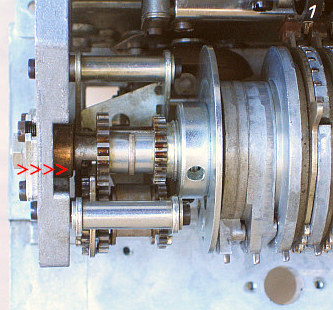
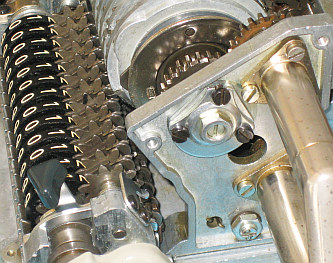
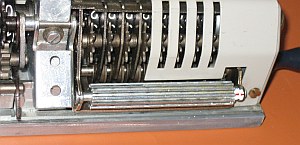
See (4) ... (7): The BEARINGS OF THE INPUT-UNIT HAVE TO BE REMOVED! Press-down
the FRONT-LEVER with a CLIP to have free hands: LIFT-AND-WIGGLE the INPUT-UNIT
with the left hand so, that with the right hand the CARRIAGE could be moved STEP-
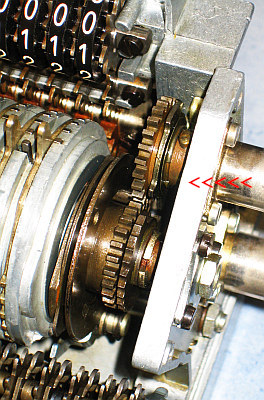
BY-STEP OUT TO THE RIGHT ... Observe (5) the "Reverse-Lock" synchronisation!
ASSEMBLING THE ODHNER-239 after CLEANING, R E P A I R & OILING ...
----------------------------------------------------------------------
< S T A R T >
o Replace the 4 FEET temporarely to have CEARENCE for TEST-Operation !!!
Set INPUT-UNIT to ZERO - Set INPUT-DISPLAY to ZERO. Place INPUT-CYLINDER so, that
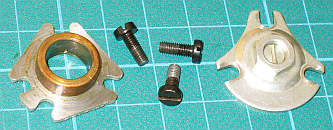
ZERO-LEVERs on top. Replace RIGHT BEARING temporary. Place the COUNTER-FINGERs
as shown in (8a)&(8b). Replace the LEFT BEARING temporary. It should be working:
o Cranking the Input-Unit clockwise & counter-clockwise.
o The "TOP-FINGER" has to pass the "GAP" in the axle!
o The "DOWN-FINGER" has to fit in the SQUARE, when levers are lifted.
o The "REVERSE-LOCK" synchronization prevents changing direction in a crank-cycle
o Setting INPUT-NUMBERS: Have to show the right DISPLAY-NUMBERS.
... IF NOT ... Continue with < S T A R T > again!
< O T H E R W I S E >
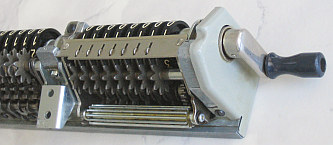
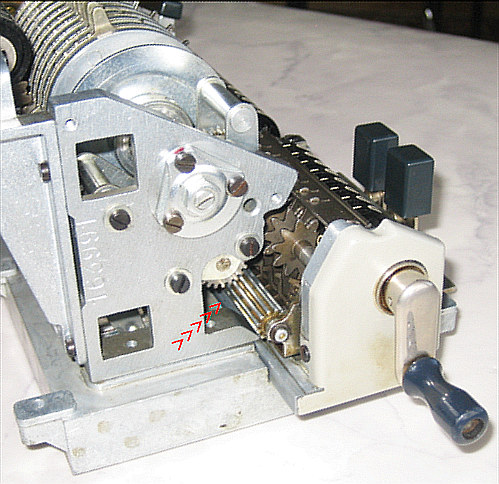
Continue with the CARRIAGE, see (9):
o Try to lift the LEVER ON BACK SIDE by HAND (!) when turning the LONG GEAR:
There is a position were it could be lifted - otherwise it is blocked ...
!!! MARK [+Limit] & [-Limit] on AXLE (w."TippEx") and SET-IT in CENTER !!!
[*] [*]
-----------------
... the carriage is not removable, because the input-unit could not be cleared.
See (4) ... (7): The BEARINGS OF THE INPUT-UNIT HAVE TO BE REMOVED! Press-down
the FRONT-LEVER with a CLIP to have free hands: LIFT-AND-WIGGLE the INPUT-UNIT
with the left hand so, that with the right hand the CARRIAGE could be moved STEP-
BY-STEP OUT TO THE RIGHT ... Observe (5) the "Reverse-Lock" synchronisation!
ASSEMBLING THE ODHNER-239 after CLEANING, R E P A I R & OILING ...
----------------------------------------------------------------------
< S T A R T >
o Replace the 4 FEET temporarely to have CEARENCE for TEST-Operation !!!
Set INPUT-UNIT to ZERO - Set INPUT-DISPLAY to ZERO. Place INPUT-CYLINDER so, that
ZERO-LEVERs on top. Replace RIGHT BEARING temporary. Place the COUNTER-FINGERs
as shown in (8a)&(8b). Replace the LEFT BEARING temporary. It should be working:
o Cranking the Input-Unit clockwise & counter-clockwise.
o The "TOP-FINGER" has to pass the "GAP" in the axle!
o The "DOWN-FINGER" has to fit in the SQUARE, when levers are lifted.
o The "REVERSE-LOCK" synchronization prevents changing direction in a crank-cycle
o Setting INPUT-NUMBERS: Have to show the right DISPLAY-NUMBERS.
... IF NOT ... Continue with < S T A R T > again!
< O T H E R W I S E >
Continue with the CARRIAGE, see (9):
o Try to lift the LEVER ON BACK SIDE by HAND (!) when turning the LONG GEAR:
There is a position were it could be lifted - otherwise it is blocked ...
!!! MARK [+Limit] & [-Limit] on AXLE (w."TippEx") and SET-IT in CENTER !!!
[*]  ... DETAIL: ... DETAIL: 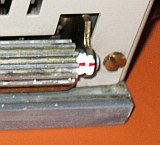 When in CLEARING COUNTER-UNIT the LEVER get lifted, it lift with it the
LOWER STRUCTURE in (8a) to RESET the COUNTER-DIRECTION-Finger.
FINISH THE ODHNER-239 T E M P O R A R Y ...
--------------------------------------------
See (10)&(11): Press the FRONT-LEVER with the left hand and "thread-in" the
CARRIAGE from the right side. The carriage MAY STOP, touching tooth of LONG-GEAR
and LEFT GEAR of the body, see (4). TAKE A NEEDLE and make the long-gears pass!
Bring the carriage to the midle. Flip the calculator upside down. Insert the
CARRIAGE LIMITER, screw it. Flip the calculator upside again. T E S T I T !!!
... WHEN TESTS SUCCESSFUL:
FIX the LEFT & RIGHT BEARINGS. Remove the CARRIAGE LIMITER, REMOVE the CARRIAGE.
THE F I N A L ASSEMBLING OF THE ODHNER-239 ...
------------------------------------------------
... REMOVE the temporary placed 4 FEET ...
See (12): PLACE & SCREW all COVER-PIECES in reverse order ...
CONTINUE at < O T H E R W I S E > ... until all T E S T S are OK!
impressum:
************************************************************************************
© C.HAMANN http://public.BHT-Berlin.de/hamann [*] 06/13/16
When in CLEARING COUNTER-UNIT the LEVER get lifted, it lift with it the
LOWER STRUCTURE in (8a) to RESET the COUNTER-DIRECTION-Finger.
FINISH THE ODHNER-239 T E M P O R A R Y ...
--------------------------------------------
See (10)&(11): Press the FRONT-LEVER with the left hand and "thread-in" the
CARRIAGE from the right side. The carriage MAY STOP, touching tooth of LONG-GEAR
and LEFT GEAR of the body, see (4). TAKE A NEEDLE and make the long-gears pass!
Bring the carriage to the midle. Flip the calculator upside down. Insert the
CARRIAGE LIMITER, screw it. Flip the calculator upside again. T E S T I T !!!
... WHEN TESTS SUCCESSFUL:
FIX the LEFT & RIGHT BEARINGS. Remove the CARRIAGE LIMITER, REMOVE the CARRIAGE.
THE F I N A L ASSEMBLING OF THE ODHNER-239 ...
------------------------------------------------
... REMOVE the temporary placed 4 FEET ...
See (12): PLACE & SCREW all COVER-PIECES in reverse order ...
CONTINUE at < O T H E R W I S E > ... until all T E S T S are OK!
impressum:
************************************************************************************
© C.HAMANN http://public.BHT-Berlin.de/hamann [*] 06/13/16
|